 Deutsch
Photogrammetry 101
Capturing: Taking the Photos
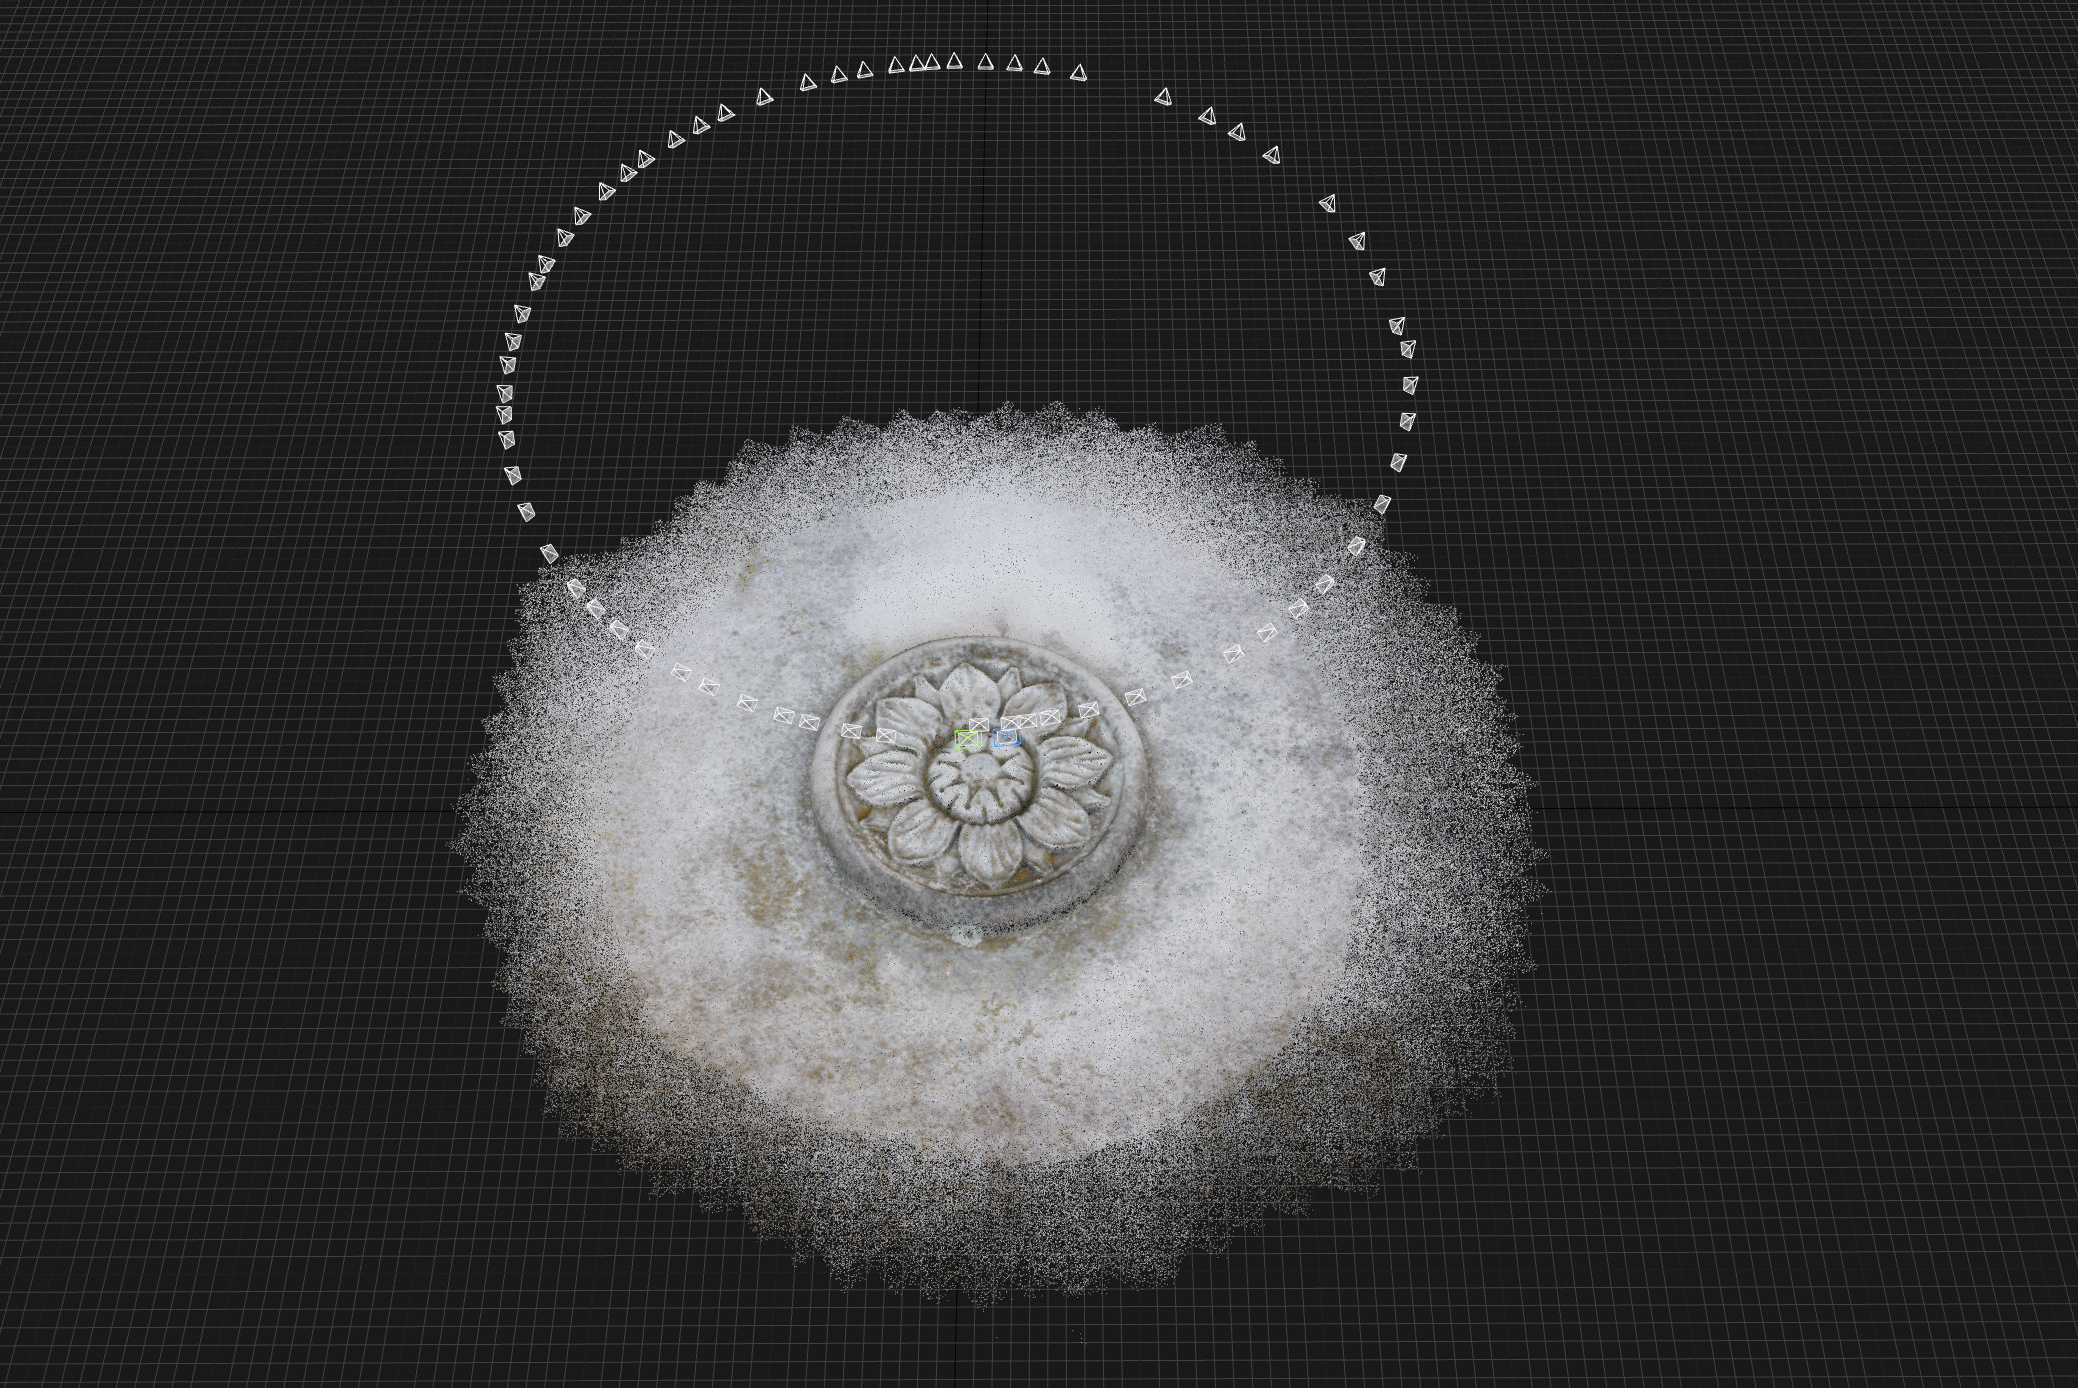
For an object like this rosette usually 60 to 70 photos around it are sufficient to capture most details. However, the more photos you take the more detail the resulting geometry will contain. If the object was mobile it can be put on a turntable or if its orientation was horizontal you can walk around it to find each perspective. (Since the rosette is on a wall, I use a turning construction on a tripod)
Lighting: Take the photos on a cloudy day or choose a time when the location lies in the shadow for at least one hour or more. Direct sunlight, object shadows and other objects’ shadows that cross an the object and change during the period of taking the photos will lead to inconsistent image content and result later in registration issues during the processing steps. Avoid drastic light changes during dawn or dusk.
Equipment: Use a tripod if you need long exposures (longer than 1/60th). As lens take a wide angle lens with approximately 35mm focal length on a full frame camera or a 35mm equivalent if you are using a camera with a sensor crop. Important, don’t mix photos with different focal length, the software can not calibrate them.
Exposure: Use a low ISO value, i.e. between 100 and 800. More important set the aperture to an F-stop that offers a wide depth of field. Usually an F-stop of F/8 or rather F/11 will do. You will see why a tripod is mandatory with these settings. The image needs to be as bright as possible so the darkst shadow shows still some detail. Since over exposure due to direct sunlight is unlikely here, slightly overexpose each photo (turn off any automatic)If the exposure allows to take the photos hand-held make sure to vary the distance of the camera to the center of the object from image to image slightly. This will help later when the software is aligning the photos.
Composition: To get the most out of your camera’s resolution try to photograph the object filling the frame. Don’t frame to close to the edges since this will distort the object and could reveal the lense’s weekness in the corners.
Shooting in RAW: Finally consider to shoot in RAW if possible. This will open up a whole lot of possibilities when post-processing the photos. Keep in mind the software needs as much information it can get from the photos only and in a most consistent way. Varying exposures, inconsistent white balances, or photos where the object is slightly out of focus in an area are hard to register and process. Shooting in RAW will give you the opportunity to normalize all nuances or dratsic changes in lighting the object encountered during the shooting phase (mind the decreasing light and changing colors during dusk).
Developing the Photos
- If you chose to shoot in RAW you can develope the photos to JPG files without compression (Quality=100%).
- Find a white balance for all photos
- Expose the photos so they all show the same luminosity. If you took them during changing lighting conditions alter each photo’s exposure to settle them
- The same applies if the colors changed on location: adjsut the white balance for each photo
- Sharpen the photos a nbit more than you would do if it was a normal photo. The software will thank you when finding features to align the photos to.
No Comments